Hello my dear reader,
Happy Easter to you!
Thank you for the love and support so far.
I hope you are enjoying and making the most of the long weekend.
Is it just me or is anyone else happy about not going to school/work tomorrow…:mrgreen:
We live in a generation where every girl/lady/woman wants to be on fleek. Nobody is on chill anymore…😂😂
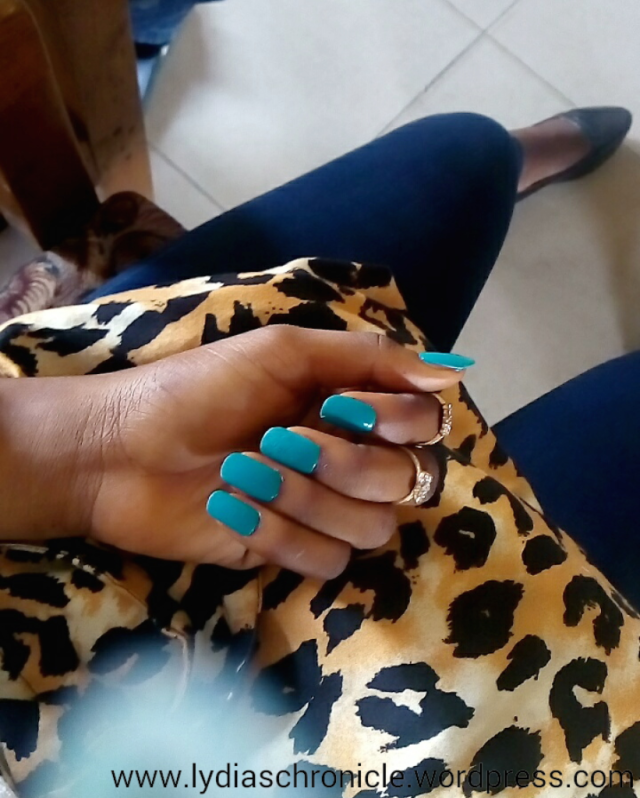
Personally, I don’t really like fixing my nails,you’ll find out why soon. But here’s an inexpensive and time-saving way of getting your nails on fleek. Its called DIY (Do-It Yourself),yep, do it yourself gurrl. By the end of the post you’ll see reasons why you should really do it yourself.
So let’s get started,to get your nails done here are the things you’ll need;
• Acrylic nails (one pack is just 50-100)
• Nail polish
• Clear nail polish (nail hardener)
• Nail polish remover
• Nail file
• Nail buffer
• Cotton wool/cotton swabs
• Glue (Alteco)
Directions
1. Using a nail cutter or scissors,cut the acrylic nails to preferred length (I don’t like mine too long).
2. Using the nail file,shapen the nails to preferred shape. This is a visual guide to nail shapes.
I personally prefer the squoval shape (its beginning to look like s round though🙉)…
3. Buff your nails with the nail buffer and clean the surface with cotton swabs to make them smoother.
4. Apply the glue on the surface of your nail,not too much,but enough to hold the acrylic nails.

Now, let me tell you the reason why I don’t like fix my nails.
The first and only time I ever tried fixing my nails,I went to a around school . During the course of fixing it they put so much glue that I made that i could it see the dried up residue right beneath the acrylic nails. To make matters worse some layers my nails peeled off when it took it off. To be honest I was so furious and never tried it again since then. Besides I love my nails,they are strong and growing longer so I see almost no need.

But heyy, for the sake of those who love to fix their nails ,those who love DIYs and those who love trying new things let’s get back to business…shall we?
5. Apply a coat(or two) of your nail polish and allow to dry for about 5-10 mins.
6. Then apply clear nail polish (known as ‘nail hardener’) then leave for about 15-20 mins to dry properly.
And voila,you got ya nails done.
PS; You could also fix the acrylic nails before shaping it,if it’ll be easier for you that way. I just chose to do it this way.
The best part of fixing your nails yourself is that;
– You get to do it to your taste.
– You get to keep the remaining acrylic nails,nail polish,nail polisher remover and every other thing used, so you use them another time.
– You get to use just the right amount of glue you need, so you don’t end up like me.
– You don’t need queue up to get your nails fixed(Gosh It’s so annoying😒), when you can use that time to fix it yourself and do other things.
I’m loving the nails,yikes!

So ladies,lets get talking, I’ll love know what’s you think. What’s your opinion on getting your nails done yourself,please drop your comments.
Have a wonderful week ahead!
And Happy Easter once again…😘😘
Thank you for stopping by.
Yours sincerely,
Lydia


Yes, I love the squared oval nail shape also. And love the colour !! -Zaychishka
LikeLiked by 1 person
You know…👌
LikeLike
And Happy Easter 🙂
LikeLiked by 1 person
Happy Easter too you too,thanks for stopping by…❤
LikeLike
nice one Tomi….. I guess I would try the tips someday….
THANKS
LikeLiked by 1 person
Thank you☺
LikeLike
Awww…great post..
I don’t really like fixing too tho..
May try this 😊
LikeLiked by 1 person
Just for the love of trying out new things…. Lol
Thank you
LikeLiked by 1 person
I love this idea! Thanks for the nail guide, saving that to my desktop hehe.
http://lifestylefinesse.com
LikeLiked by 1 person
Hehe….😂😂
Thanks for stopping by dear.
LikeLike
Like your nails!!! I tried this tip a while ago, didn’t work for me. The nails didn’t last past that day. Maybe I bought fake glue. Vowed ever since to have a professional do my nails or not at all.
LikeLiked by 1 person
Lool! Really
Aww.
Another try never hurts tho
LikeLike
I love the coffin shaped nails. I think I’ll try it! Great post.
http://www.journalthreesixty.wordpress.com
LikeLiked by 1 person
Lool,coffin shaped….😂😂😂
Thanks for dropping by
LikeLiked by 1 person
I’m going to try this. the first and only time I ever fixed my nails was not so good like your experience. my natural nails were scarred for like 3 months after I removed the false ones.
That Kinky Girl
LikeLiked by 1 person
I can imagine, you really should try it.
Thank you for dropping by.
LikeLike
Thanks for the tip. The last time I fixed my nails, I vowed never to do them again because my nails also [peeled off when getting rid of the false nails. ‘
I’ve always wanted to try to do them myself because I would be able to control the amount of glue in it but I always procrastinate. You just gave me the motivation to do it.
http://myfashionmusings.com
LikeLike
Pingback: DIY | The Multi-functional Neckpiece – Lydia's Chronicle